Ansel Adams changed photography by combining a very clear style, strict techniques and a deep respect for light. His impact on photography goes beyond landscapes. The way he worked, from visualising a picture to controlling tones in the print, is still a useful guide for any photographer today.
Key Takeaways
- Visualization is Your Blueprint: The single most important lesson from Adams is to not just take a photograph, but to make one. Always ask: “What is the emotional impact I want to convey?” and plan your shot (and post-processing) accordingly [07:48].
- Discipline is the Foundation of Art: Adams’ commitment to the precise, repetitive practice of music translated into his meticulous approach to photography. Dedication to mastering technical skills (like metering, composition, and darkroom work) is what frees your creativity [03:51].
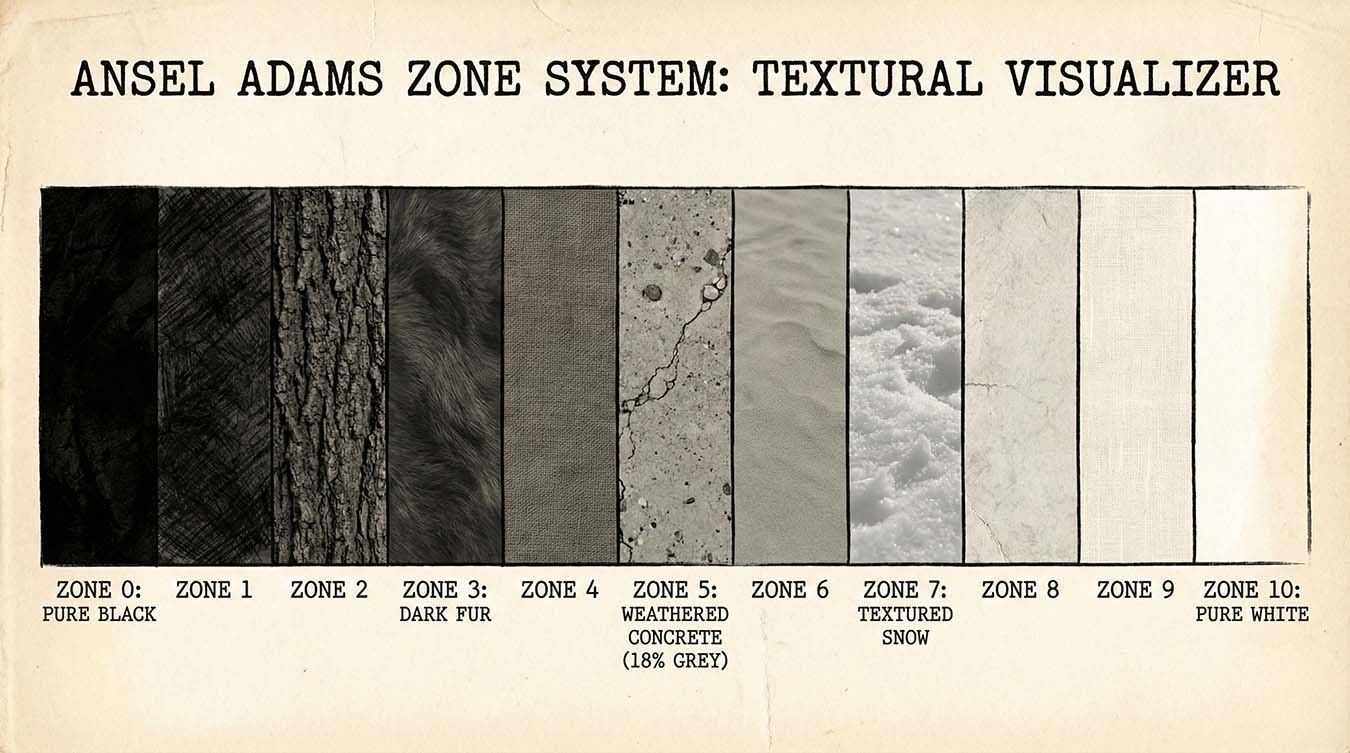
- Harness Tonal Range: Adams’ work proves that a masterpiece is often made not just on location, but in the darkroom. Techniques like the Zone System and dodging and burning are crucial for exploiting the full dramatic potential of light and shadow in an image [12:37].
- Embrace Sharpness and Detail: Adams’ push with Group f/64 championed a return to the natural beauty of the camera’s ability to capture incredible detail. Don’t be afraid to use small apertures to achieve maximum sharpness and depth of field when the scene demands it [10:22].
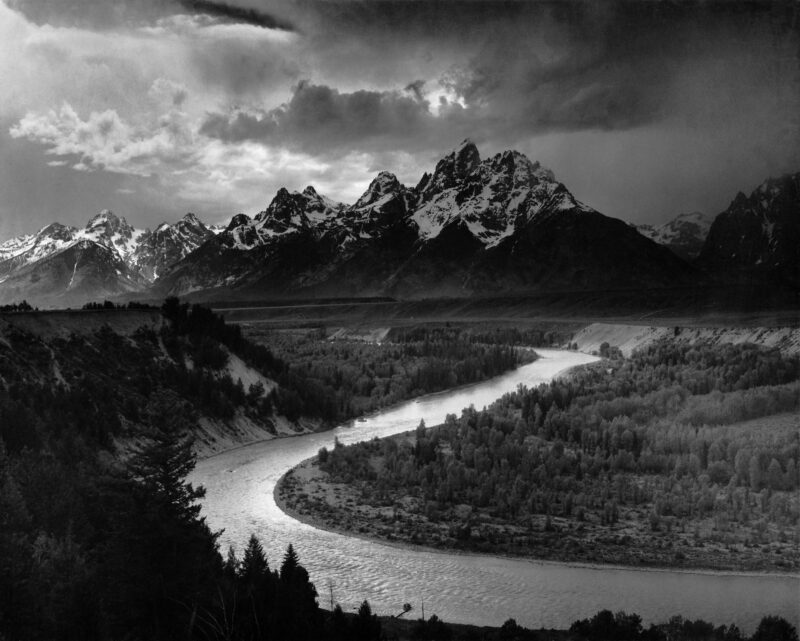
The Tetons and the Snake River, Grand Teton National Park (1942)
This is a masterclass in tonal control, showcasing deep shadows (Zone I) in the foreground trees,
rich mid-tones, and brilliant highlights (Zones IX/X) on the river and snow-capped peaks.
Ansel Adams photography style in simple words:
Adams built a clear and honest style. High detail, deep blacks, bright highlights and calm, balanced compositions. He wanted the print to feel sharp and rich from front to back, with strong structure and no gimmicks. Even when the scene was dramatic, the picture stayed clean and controlled rather than flashy.
Ansel Adams techniques we can still use:
A few of his techniques sound complex, but the ideas are simple.
– Visualise first. Decide what you want the print to feel like before you press the shutter.
– Expose for the tones that matter. Place your important shadow or highlight carefully so it keeps detail.
– Work on the print, not just the file. Shape contrast and local tones until the picture matches what you had in mind.
– Use small apertures when the scene needs it. He often stopped down to keep everything sharp and clear.
When I walk with a camera, I can try to see the final image in my head, watch my tones and give the frame a clear structure before I think about any presets.